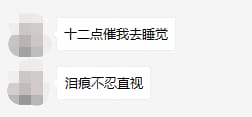
ガールフレンドが深夜12時に彼女をベッドに急がせるよう頼んだが、私はそれをしないパイソンを持っています。
ここで問題です。今夜、私のガールフレンドが12時に急いでベッドに入るようにと頼んできました。
でも、でも、眠くて起きていられない......ですよね?恋人と寝ることより大事なことがあるのか?
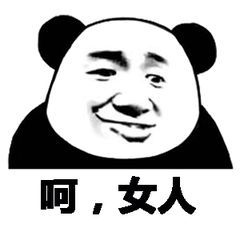
でも、恋人の命令には、あえて逆らわない・・・・・・。

でも、睡眠不足にはなりません
この時点でどうするか?そろそろPythonの出番です!
Pythonの登場
今回は彼氏の義務として、夜の12時に恋人にメッセージを送る自動プログラムを作ってみましょう。
インストールとインポート
2つのモジュールが必要です。 apscheduler と ピュートグイ
ショートカット Windows+r でファイル名を指定して実行のコントロールボックスを開き、cmd と入力し、コマンドラインに移動して、入力します。
pip install apscheduler
pip install pyautogui
インポートする。
import pyautogui
from datetime import datetime
from apscheduler.schedulers.blocking import BlockingScheduler # Scheduler that blocks the current process
# The blocking type scheduler blocks the current process, if you want a scheduler that runs in the background, you can use the following code.
# from apscheduler.schedulers.background import BackgroundScheduler
ピョートーギ
まず、メッセージの自動送信機能を実装してみましょう
pyautoguiはマウスやキーボードを操作することができる非常に強力なライブラリです。これを使って、コンピュータで自動的に行うことにします。
まずは基本的な設定から。
pyautogui.PAUSE = 1 # Set the interval (in seconds) between each operation, which prevents operations from going too fast
そして、WeChatにログインし、最小化します。
次に、WeChatタスクバーアイコンにマウスオーバーして、以下のステートメントを実行し、このポイントでのカーソルの座標を取得し、Pointオブジェクトを返します。
print(pyautogui.position()) # Print the coordinates, Point(x=148, y=879)
icon_position = pyautogui.position() # Point(x=148, y=879)
WeChatを開き、あなたのガールフレンドのトークバックウィンドウを選択し、入力ボックスにマウスを置き、再度カーソルの座標を取得します。
print(pyautogui.position()) # Print coordinates, Point(x=174, y=751)
entry_position = pyautogui.position() # Point(x=174, y=751)
次に、制御プログラムは2点を順番にクリックする。
pyautogui.click(icon_position) # Default left-click
# pyautogui.click(148, 879)
pyautogui.click(entry_position)
# pyautogui.click(174, 751)
WeChatを開き、フォーカスをロックした状態で、テキストの入力を開始します。
テキストの入力は、2つの方法で行うことができます。
-
pyautogui.typewrite(['o', 'n', 'e', 'enter'])メソッドにリストを渡します。各要素は単一の文字または特殊キーです。
-
pyautogui.typewrite('You can type multiple letters in this way')文字列を渡すが、文字と特殊キーを同時に印刷することはできない。
この2つの方法はどちらも中国語を直接入力できないので、入力メソッドに頼ることになります。
pyautogui.typewrite([*list('zhengzai '), *list('jinxing '), 'shift', *list('pyautogui'), 'shift', *list('shiyan '), 'enter'], 0.1) # The first argument is the input text, the second is the interval between inputting each character
操作性を高めるために
ヒューマンライク
マウスを移動させるコードを追加してみましょう。
pyautogui.moveTo(icon_position, duration=2) # duration is the execution time, optional
pyautogui.click(icon_position)
pyautogui.moveTo(entry_position, duration=2)
pyautogui.click(entry_position)
pyautogui.typewrite([*list('zhengzai '), *list('jinxing '), 'shift', *list('pyautogui'), 'shift', *list('shiyan '), 'enter'], 0.1) # The second parameter is the interval between pressing each optional
効果をご覧ください。
もちろん、本当に大量に入力するのが面倒な場合は、コピー&ペーストでOKです。
import pyperclip

pyperclip.copy('Experimenting with Chinese, please ignore it and don't call me an idiot') # copy
pyautogui.hotkey('ctrl', 'v') # Press the key combination method, ctrl+v paste
pyautogui.press('enter') # Press the key
<イグ
これでWeChatメッセージの自動送信は完了です。
アプスケジューラ
APScheduler は、Python コードの実行を一度だけ、あるいは定期的に、遅延スケジューリングできる Python ライブラリです。いつでも新しいタスクを追加したり、古いタスクを削除することができます。非常に便利なタイムドタスクを実現します。
scheduler = BlockingScheduler() # Instantiate a scheduler
scheduler.add_job(main, 'date', run_date=datetime(2021, 8, 18, 24, 00, 00)) # Add a job
scheduler.start()
add_jobメソッドはここで3つの引数を渡します。1つ目は時間が来たときに実行される関数、2つ目はトリガーの種類です。ここでは日付トリガーを使用しています。これは特定の時点でトリガーされ、ジョブは一度だけ実行されます。3番目のパラメータであるrun_dateは、実行時間です。この前にmain関数で自動メッセージ送信のコードをラップしておいたので、あとは時間が来たらそれを呼び出すだけです。
フルコード
import pyautogui
import pyperclip
from datetime import datetime
from apscheduler.schedulers.blocking import BlockingScheduler

def main():
	pyautogui.PAUSE = 0

	icon_position = pyautogui.Point(x=148, y=879) # Taskbar icon position
	entry_position = pyautogui.Point(x=174, y=751) # entry box position

	pyautogui.moveTo(icon_position, duration=1) # duration is the execution time, optional
	pyautogui.click(icon_position)
	pyautogui.moveTo(entry_position, duration=0.7)
	pyautogui.click(entry_position)
	pyperclip.copy('Go to sleep')
	pyautogui.hotkey('ctrl', 'v')
	pyautogui.press('enter')
    pyperclip.copy('stupid pig')
	pyautogui.hotkey('ctrl', 'v')
	pyautogui.press('enter')

scheduler = BlockingScheduler() # instantiate
scheduler.add_job(main, 'date', run_date=datetime(2021, 8, 18, 24, 00, 00)) # add task
scheduler.start()
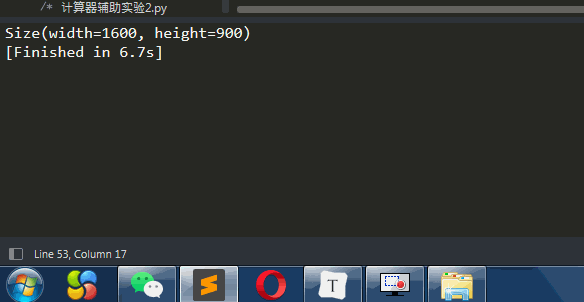
完了!これでもう寝られますね。
成果
翌朝起きたら、「なんで夜中の12時にまだパソコンがついていて、独り言をつぶやいているんだ!」と母に叱られました。
しかし、良いニュースは、私は恋人を失わなかったし、彼女を仕留めることができたということだ!
- THE END
さて、今回の記事はこれで終わりです。私が共有したのは以上です。読んでくださってありがとうございました。
この記事はコラムに含まれています。
Python関連
著者をフォローし、彼の記事を読み続けて、Pythonについてもっと学びましょう!
https://blog.csdn.net/weixin_52132159
おすすめの読み物
- クローラー
- Pythonに関するいくつかのこと
- チュートリアル
- インスタンス
- その他
関連
-
RuntimeWarning: ログでゼロによる除算に遭遇した
-
python3 failed to start Fatal Python error: initfsencoding: unable to load file system codec
-
from scipy.interpolate import spline errorImportError: cannot import name 'spline'.
-
ModuleNotFoundError: ConfigParser' という名前のモジュールはありません。
-
タートル共通機能関数
-
python error TypeError: 'range' object does not support item assignment, solution
-
Python3+BeautifulSoupがUnicodeEncodeErrorを報告:'charmap' codec can't encode characters in position
-
idea create python project report Unresolved reference 'xxx' .... の解決策
-
ValueError: 連結軸を除くすべての入力配列の次元が正確に一致する必要があります。
-
pygalマッピング "AttributeError: 'NoneType' オブジェクトには 'decode' という属性がありません"
最新
-
nginxです。[emerg] 0.0.0.0:80 への bind() に失敗しました (98: アドレスは既に使用中です)
-
htmlページでギリシャ文字を使うには
-
ピュアhtml+cssでの要素読み込み効果
-
純粋なhtml + cssで五輪を実現するサンプルコード
-
ナビゲーションバー・ドロップダウンメニューのHTML+CSSサンプルコード
-
タイピング効果を実現するピュアhtml+css
-
htmlの選択ボックスのプレースホルダー作成に関する質問
-
html css3 伸縮しない 画像表示効果
-
トップナビゲーションバーメニュー作成用HTML+CSS
-
html+css 実装 サイバーパンク風ボタン
おすすめ
-
問題解決しました。Pythonを起動しても「ImportError: No module named site" というエラーでPythonを起動する。
-
仮想環境を作成するコマンドが見つからない virtualenv: コマンドが見つからない
-
Python3ダウンロードファイルです。AttributeError:モジュール 'urllib' には 'request' という属性がありません。
-
virtualenvwrapperのコンフィギュレーションエラー
-
TypeError: 'numpy.ndarray' オブジェクトが呼び出し可能でないエラー処理
-
Pythonクローラー共通ライブラリリクエスト、beautifulsoup、selenium、xpathまとめ
-
Anaconda 詳細インストールおよび使用チュートリアル(画像付き)
-
Selenium issue IOError: [Errno 2] そのようなファイルまたはディレクトリがありません: 'nul'
-
tkinter モジュールを使った Python 倉庫番ゲーム
-
Mac環境でのbrewコマンドが見つからないエラーの解決方法