メール送信を自動化するPython - Blog内のメッセージのメールアドレスを自動で取得して送信
自動送信メールのPython実装 - 自動的にブログ/ウェブサイトをクロールしてコメントを残し、メールを送信します。
背景
掲示板やブログでは、多くのユーザーがメッセージのメールボックスから情報を取得していますが、メッセージの数が多いので、ブロガーが一つ一つ送信するのは面倒だし、新しいコメントを見つけるのも間に合わないことが多く、効率が悪すぎます。私は怠け者なので、それに耐えられず、Pythonのスクリプトで自動化しようと思いました。
例えば、私のブログでは 組み込み学習の好事例プロジェクトとトピック(コード資料、学習ビデオ、組み込み学習プラン付き) 毎日ブログをブラッシュアップして、メールボックスを手動でクリックしてメールを送信する必要はありませんね。
スクリプトが解決しようとしている問題。
のコメント欄から自動的にコメントを探し出すスクリプトが必要です。
新着メール
その内容をもとに、関連する情報をメールに統合し、SMTPで相手のメールボックスに送信する。なお、新しいメールアドレスなので、当然ながら前に送ったスクリプトでは、再び人に送ることはできない。
このような問題は、Pythonスクリプトの様々な整形ライブラリ関数を使うことで、簡単かつ完璧に解決することができます。
実装
実装はほぼ同じで、BlogページからコメントデータをPythonでクロールし、それを 正規表現 を使ってページ上のメールデータをフィルタリングし、その上で 新しいメールボックス でプロファイル情報をファイルに書き出し、標準的なメールを作成します。 SMTP を送信します。
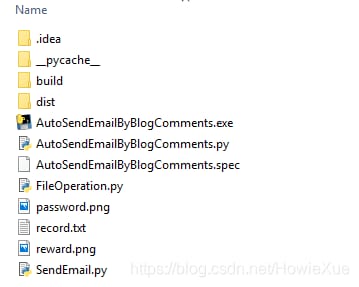
コードのディレクトリ構成は以下の通りです。
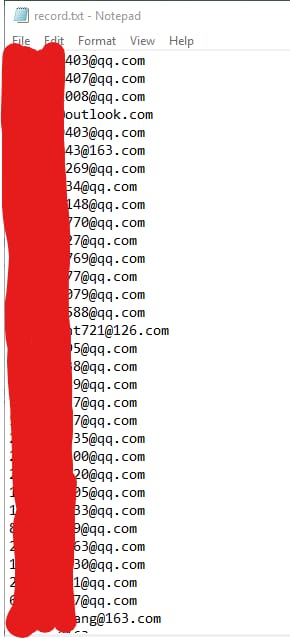
ここで、record.txtはすべての新しいメッセージを記録するファイルです。
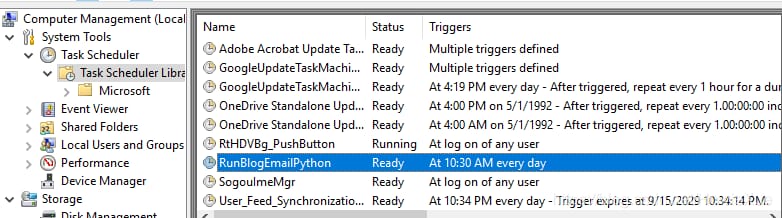
最後に、スクリプトはexeにパッケージ化され、スクリプトを実行するには
タスクスケジューラ
このプログラムは1日に1回呼び出され、毎日新しいメッセージが自動的に受信されるようになります。
コードとパース
1. ブログコメントによる自動送信メール(AutoSendEmailByBlogComments.py)
データを取得し、正規表現でメールデータをフィルタリングし、過去のデータから新しいメールボックスかどうかを判断し、メールの送信をスケジューリングする役割を担っています。コードは以下の通り。
import time
import urllib.request
import re
from SendEmail import SendEmailtoAddr
from FileOperation import RecordEmail, isNewEmail

HasNewEmail = False


def handleEmailAddr(EmailAddr):
    isNew = isNewEmail(EmailAddr)
    if isNew == True:
        print('Get New Email addr:' + EmailAddr)
        isSuccess = SendEmailtoAddr(EmailAddr)
        if isSuccess == True:
            RecordEmail(EmailAddr)
        	global HasNewEmail
        	HasNewEmail = True
        	print('Send email to '+EmailAddr+': success!')
        else:
        	print('Send email to '+EmailAddr+': Failed, Pls. retry...')


def SendEmailByBlogComments(url):
    rsp = urllib.request.urlopen(url)
    html = rsp.read().decode("utf-8")
    # return all substrings matching the mailbox format as a list
    emaillist = re.findall(""[A-Za-z0-9_]+@\w+\w. \w+", html)

    print('Get Email list from CSDN: ')
    print(emailList)

    for emailFromBlog in emailList:
        handleEmailAddr(emailFromBlog)

# My blog URL
url = "https://blog.csdn.net/howiexue/article/details/76696316#comments"


SendEmailByBlogComments(url)

if HasNewEmail == False:
    print("No New email found, do nothing... This window will close after 10s")
else:
    print("Done! This window will close after 10s")

time.sleep(10)
ここでは、正規表現に[A-Za-z0-9_]+@Θw+を渡しています。\はメールボックス形式のデータ全てにマッチします。
2. FileOperation.py
RecordEmail()はメールボックスのデータをrecord.txtに書き込み、isNewEmail()はrecord.txtを読み込んで新しいメールボックスかどうかを判断する、という主にファイルらしい操作を行っています。
def RecordEmail(EmailAddr):
    fileName= 'record.txt'
    with open(fileName,'a') as record:
        record.write(EmailAddr+"\n")


def isNewEmail(EmailAddr):
    fileName = 'record.txt'
    with open(fileName) as record:
        lines = record.read().splitlines()
        #print(lines)
        if EmailAddr in lines:
            return False
        else:
            return True
3. SendEmail.py
このファイルは主にMIME経由でメールデータを構築し、smtplib経由で送信するために使用されます。
# coding:utf-8
# smtplib module is responsible for connecting to the server and sending emails
# MIMEText: defines the text data of the message
# MIMEImage: defines the image data of the message
# MIMEMultipart: responsible for assembling text images and audio together to add attachments
import smtplib # Load smtplib module
from email.mime.text import MIMEText
from email.utils import formataddr
from email.mime.application import MIMEApplication
from email.mime.image import MIMEImage
from email.mime.multipart import MIMEMultipart

sender = '[email protected]' # my email, i.e. sender email account
passwd = '' # here fill in the authorization code, note that not the mailbox password, so Secret data of course hidden
mailserver = 'smtp.163.com'
port = '25'
sub = 'CSDN Profile Password By HowieXue' #subject for the mailbox

def SendEmailtoAddr(receive):
	try:
		msg = MIMEMultipart('related')
		msg['From'] = formataddr(["Howie", sender]) # sender's email nickname, sender's email account
		msg['To'] = formataddr(["BlogUser:"+receive, receive]) # Recipient email nickname, recipient email account
		msg['Subject'] = sub

		# body, html format
		body = """


Please check the password for the information, thanks for following my CSDN blog~
Blog post at: https://blog.csdn.net/HowieXue/article/details/76696316


Best Regards,
HowieXue (Xue Yonghao)
send by script of
Python3
...


		"""
		# link image, the actual content of the material is displayed through the image, this is done to avoid 163 Server misjudging it as spam, the image is the web address and password of the relevant material
		text = MIMEText(body, 'html', 'utf-8')
		f = open(r'C:\**\password.png', 'rb') # the inserted image
		pic = MIMEImage(f.read())
		f.close()
		pic.add_header('Content-ID', '
'
)

		msg.attach(text)
		msg.attach(pic)

		rew = open(r'C:\**\reward.png', 'rb')
		rewPic = MIMEImage(rew.read())
		rew.close()
		rewPic.add_header('Content-ID', '
'
)

		msg.attach(rewPic)


		server = smtplib.SMTP(mailserver, port) # SMTP server in sender's mailbox, port is 25
		server.login(sender, passwd) # sender mailbox account, mailbox password
		server.sendmail(sender, receive, msg.as_string()) # sender mailbox account, recipient mailbox account, send mail
		server.quit()

		return True
	except Exception as e:
		print(e)
		return False
Record.txtはこのように読み取れます。
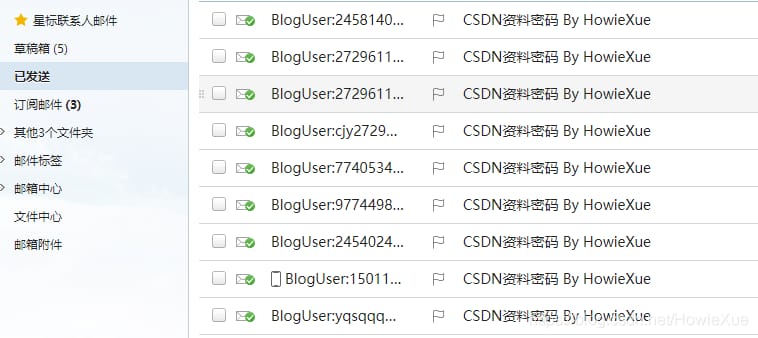
送信されたメールはこのような感じです。
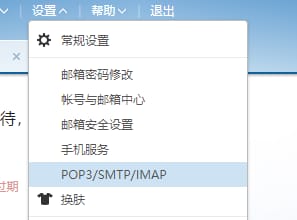
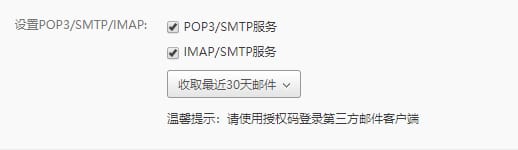
注)メールボックスのSMTP設定
通常、メールボックスはデフォルトでこのサービスがオフになっているので、オンにし、認証コードを設定する必要があります。
163のメールボックスの場合は、以下の設定から変更します。
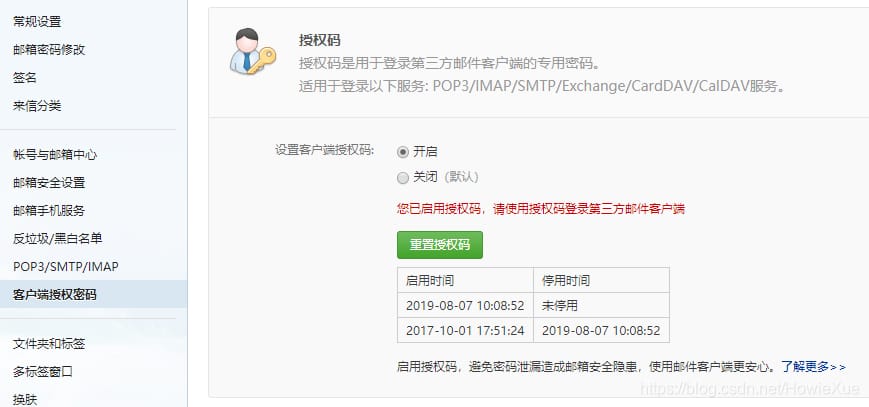
また、クライアントの認証コード(スクリプトでメールボックスに接続するためのもの): をオンにして設定します。
その他の楽しいPythonスクリプト
Pythonでメールを自動化 - ブログやウェブサイトを自動的にクロールしてメッセージを探し、対応するメールを送信する
Python 自動コード生成 - tkinter によるコードフレームのグラフィカルな操作と生成
Python Parsing CSV Data - ロジックアナライザからエクスポートされたCSVデータをPandasでパースする。
Django経由でLuaスクリプトを実行するWebサイトを構築するPython(データパース機能を実装)
ブロガーがおすすめする人気記事
一気読みシリーズ。
- 無接点充電技術について1記事で読む(ソリューションの選択と原理分析付き)
- Android/iOS携帯がオーディオインターフェース(ヘッドフォンジャック)を通じて周辺機器と通信する方法
- 一読の価値あり。AndroidスマホでUSBポート経由で周辺機器と通信する方法(原理解析とソリューションの選定を含む)
LoRa Meshシリーズ。
- LoRa学習:LoRaの主要パラメータ(拡散係数、符号化率、帯域幅)の設定と説明
- LoRaの学習。チャネル占有率検出(CAD)の原理
- LoRa/FSK無線スペクトル波形解析(LoRa/FSK帯域幅、電力、周波数誤差などを試験するスペクトルアナライザ)。
サイバーセキュリティシリーズ。
- ATECC508A チップ開発ノート(I)。暗号化チップの初公開
- SHA/HMAC/AES-CBC/CTRアルゴリズム実行効率およびRAM消費量テスト結果
- 一般的な暗号化/署名/ハッシュ化アルゴリズム(マルチプラットフォームAES/DES、DH、ECDSA、RSAなど)の性能比較。
- AES暗号化・復号化効率テスト(Pure Software AES128/256) - 組み込み用Cortex-M0およびM3プラットフォームを例として
エンベデッド開発シリーズ。
- 組み込み学習で整理すべきベタープラクティスプロジェクトとトピック(コード資料、学習ビデオ、組み込み学習プランニング付き)
- IARデバッグスキルまとめ:データブレークポイント、CallStack、スタック設定、スタック使用量とスタック深度の表示、メモリ、Set Next Statement、など。
- Linuxカーネルコンパイルの設定(Menuconfig)、ファイルシステムの作成 詳細手順
- C言語コードへのAndroidの基礎的な呼び出し(JNI実装)
- Raspberry Piを最初のステップへ:電源投入と起動、中国語フォントのインストール、仮想キーボード、SSHのオープンなど。
- Android/Linux端末 有線・無線デュアルネットワーク共存(内部・外部ネットワーク同時接続)
AI / 機械学習シリーズ。
- AI:機械学習はいくつかの用語を知っておく必要があります。テーブル、フィーチャー、モデル...
- AI:オーバーフィッティングを解決する畳み込みニューラルネットワークCNN (Overcome Overfitting)
- AI:機械学習のためのデータクリーニングとは(データクリーニング)
- AI:機械学習モデルはどのように学習させるのですか?(試行錯誤の学習)
- データの可視化。TensorboardXのインストールと使用(インストールテスト+サンプルデモ)
関連
-
Python_matplotlib の凡例は外側に保存すると不完全になる
-
Ubuntu pip AttributeError: 'module' オブジェクトに '_main' 属性がない。
-
PyQt5演習:matplotlibでプロットする
-
ModuleNotFoundError: Pythonソリューションに'scipy'という名前のモジュールがありません。
-
Python OSError: [Errno 22] 無効な引数: solution
-
Logistics Regressionにおけるcoef_とintercept_の具体的な意味についてsklearnで解説します。
-
Pythonモジュールの簡単な説明(とても詳しいです!)。
-
OperationalError: データベースファイルを開くことができない Solution
-
TypeError: 'float' オブジェクトが for ループ内で整数として解釈できない どうすればよいですか?
-
Python で実行 TypeError: + でサポートされていないオペランド型: 'float' および 'str'.
最新
-
nginxです。[emerg] 0.0.0.0:80 への bind() に失敗しました (98: アドレスは既に使用中です)
-
htmlページでギリシャ文字を使うには
-
ピュアhtml+cssでの要素読み込み効果
-
純粋なhtml + cssで五輪を実現するサンプルコード
-
ナビゲーションバー・ドロップダウンメニューのHTML+CSSサンプルコード
-
タイピング効果を実現するピュアhtml+css
-
htmlの選択ボックスのプレースホルダー作成に関する質問
-
html css3 伸縮しない 画像表示効果
-
トップナビゲーションバーメニュー作成用HTML+CSS
-
html+css 実装 サイバーパンク風ボタン
おすすめ
-
Python】import pandas, error pandas Missing required dependencies ['numpy'] Reason Analysis
-
Abort trap: 6エラーに対するPythonの解決策
-
concat を使用して 2 つのデータフレームを結合する際のエラー
-
pip Fatal error in launcher: を使用してプロセスを作成できません。
-
ImportError: Windows の Django でプロジェクトを作成するとき、django.core solution という名前のモジュールがない。
-
TypeError: 'dict_keys' オブジェクトはインデックス作成をサポートしていません。
-
エラーの原因の1つ: 'encoding'はこの関数の無効なキーワード引数です。
-
Pythonのselfの使い方を詳しく、または常にプロンプトを表示します。TypeError: add() missing 1 required positional argument: 'self' 問題は解決されました。
-
Python2.7のエンコード問題:UnicodeDecodeError: 'ascii' codec can't decode byte 0xe8 in position... 解決方法
-
Pythonです。AttributeError: module 'numpy' has no attribute 'dtype' 問題が解決されました。