雰囲気を出す MATLABで繊細なクリスマスツリーを描く
2021-12-19 続編が出ました!
この記事を元に、実装する Matlabでクリスマスツリーとメリークリスマスソングを作る ! お気軽にお試しください。
そして、Matlabのクリスマスツリーとメリークリスマスソングを弾いて踊ろう_liu08_13さんのブログ - CSDN Blog
0. 前書き
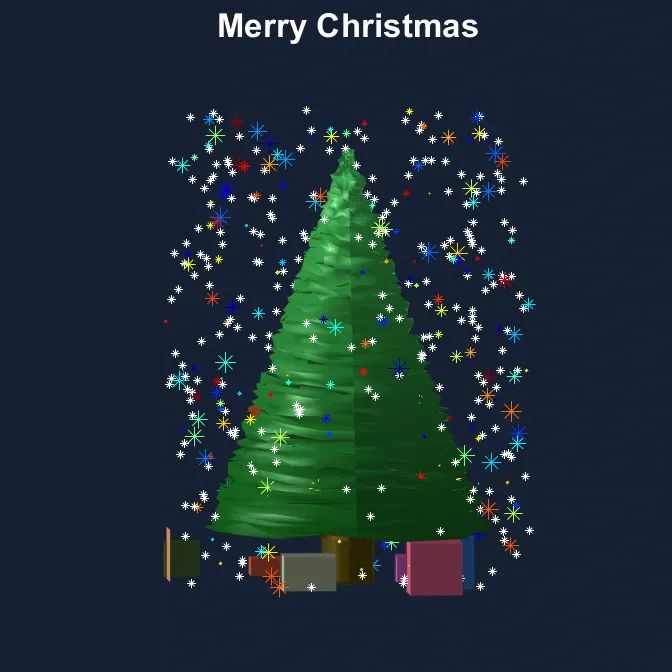
もうすぐクリスマスなので、今日はクリスマスツリーのMATLAB描画を推し進め、その結果が以下の画像です。
1. 準備
今回はMATLABを使うので、いくつかの依存ライブラリをインストールする必要があるPYTHONとは異なり、この記事の効果を得るためには、MATLABをインストールするだけで良いのです。
2. はじめに
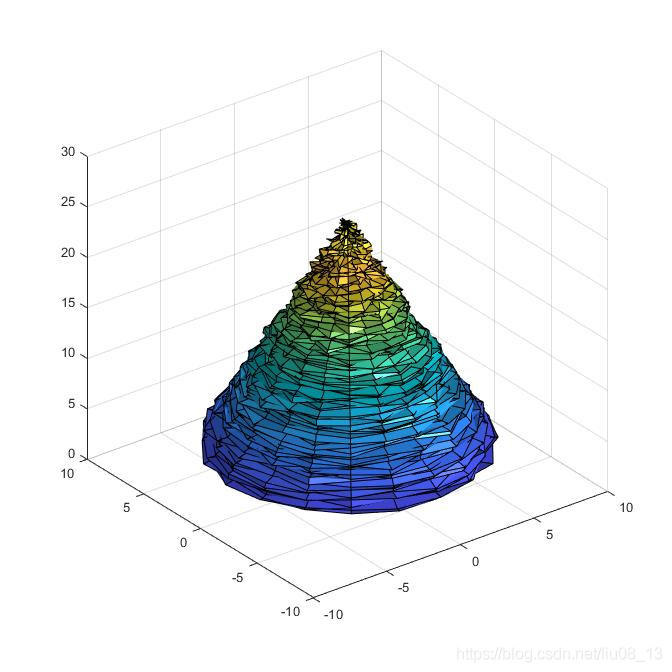
2.1 ツリーを描く
クリスマスツリーを描くには、まず... ツリーを描いてから、それをどう装飾するかを考えます。
close all;clear;clc
% setup
snow=450; % number of snow flakes [0 ... 5000]
% draw tree
h=0:0.2:25; %vertical grid
[X,Y,Z] = cylinder(tree(h)); %produce a tree formed cylinder
Z=Z*25; %scale to the right heigth
%Add some diffusion to the surface of the tree to make it look more real
treeDiffusion=rand(126,21)-0.5;%some horizontal diffusion data
%add diffusion to the grid points
for cnt1=1:21
    for cnt2=16:126%starting above the trunk
        %get the angle to always diffuse in direction of the radius
        angle=atan(Y(cnt2,cnt1)/X(cnt2,cnt1));
        %split the diffusion in the two coordinates, depending on the angle
        X(cnt2,cnt1)=X(cnt2,cnt1)+cos(angle)*treeDiffusion(cnt2,cnt1);
        Y(cnt2,cnt1)=Y(cnt2,cnt1)+sin(angle)*treeDiffusion(cnt2,cnt1);
        %some Vertical diffusion for each point
        Z(cnt2,cnt1)=Z(cnt2,cnt1)+(rand-0.5)*0.5;
    end
end
%draw the tree
h0 = figure('Units','inches');
pos = h0.Position;
pos(1) = 1; pos(2) = 1;
pos(3) = 7; pos(4) = 7;
h0.Position = pos;
surfl(X,Y,Z,'light')
<イグ
2.2 サービタイゼーション
次に、木に光を当て、色を塗り、角度をつけて立体感を出し、座標系の表示を消すと、緑の木ができあがります。
%Use as nice green color map (darker at the bottom, lighter at the top)
r=(0.0430:(0.2061/50):0.2491)';%red component
g=(0.2969:(0.4012/50):0.6981)';%green component
b=(0.0625:(0.2696/50):0.3321)';%blue component
map=[r,g,b];%join in a map
for cnt=1:6
    %change the lower part to brown for the trunk
    map(cnt,:)=[77,63,5]/265;
end
colormap(map)%set the map
view([-37.5,4])%Change the view to see a little more of the Actual 3D tree
lighting phong %some nice lighting
shading interp %remove grid and smoothen the surface color
axis equal %takes care of display in the right proportion
axis([-10 10 -10 10 0 30]) %give some more axis space (for the snow later)
axis off %but don't show axis
hold on %to draw the rest
title('Merry Christmas','color','w',...
    'fontsize',25,...
    'fontweight','Bold')
次に、画像ベースを少しカラー化する。 カラフルな黒 を追加します。 スターリーブルー 背景の時(ここは某A選手から色のリクエストを受け続けた結果、最終的に決定した色です。ありがとうございます!)
そして、ツリーの下に小さなギフトボックスをいくつか置いて、お祝いの雰囲気を演出しました。
set(gcf,'color',[22 32 51]. /255)
% Presents
%Draw some presents around the tree (each with random color)
drawPresent(2,-4,0,3,3,2);
drawPresent(-4,3,0,2,3,1.5);
drawPresent(5,3,0,4,3,3);
drawPresent(-14,-5,0,6,3,1);
drawPresent(-9,-10,0,2,2,2);
drawPresent(0,4,0,4,3,3);
drawPresent(-6,-13,0,3,3,3);
2.3 浮遊する雪片
最後に、雪の結晶を散らし、色付きのライトを描き、3D映像の角度を調整し、アニメーション効果をつけて、戦闘終了です。

% Snow
%create some random 3D coordinates for the snow (amount as in setup above)
snowX=(rand(snow-100,1)*25-12.5);
snowY=(rand(snow-100,1)*25-12.5);
snowZ=(rand(snow-100,1)*27);
color0 = jet(length(snowX));
%Note:Some flakes will end up IN the tree but just can't be seen then
for ii = 1:length(snowX)
    plot3(snowX(ii),snowY(ii),snowZ(ii),'*','color',color0(ii, :),'markersize',randi(15))%plot coordinates as white snow flakes
    % plot3(snowX(ii),snowY(ii),snowZ(ii),'*','color',color0(ii, :))%plot coordinates as white snow flakes
end
h=plot3(snowX,snowY,snowZ,'w*');
im = {};
for ii = 1:180
    if mod(ii,3) == 0
        h.Visible = 'off';
        snowX = (rand(snow,1)*25-12.5);
        snowY=(rand(snow,1)*25-12.5);
        snowZ=(rand(snow,1)*27);
        h=plot3(snowX,snowY,snowZ,'w*');
        % pause(0.25)
    else
        view([ii,4])
        % pause(0.1)
    end
    if ii > 85
        frame = getframe(gcf);
        im{ii} = frame2im(frame);
    end
end
hold off%Done
2.4 gifファイルの書き出し
ここに知識がある! ドアをノックしてください!!! セル配列から空の要素を消去する方法。
im(cellfun(@isempty,im))=[];
file2write = 'chris.gif';
for ii = 1:length(im)
    [A, map] = rgb2ind( im{ii}, 256);
    if ii == 1
        imwrite(A, map, file2write, 'gif','LoopCount',Inf,'DelayTime', 0.12);
    else
        imwrite(A, map, file2write, 'gif','WriteMode','append','DelayTime', 0.12);
    end
end
file2write = 'chris.gif';
for ii = 1:length(im)
    [A, map] = rgb2ind( im{ii}, 256);
    if ii == 1
        imwrite(A, map, file2write, 'gif','LoopCount',Inf,'DelayTime', 0.12);
    else
        imwrite(A, map, file2write, 'gif','WriteMode','append','DelayTime', 0.12);
    end
end
3. 結論
素晴らしい作品です。
MATLABでBling Blingクリスマスツリーを楽しく実装してみましょう。
著者をフォローするには、彼の公開ウェブサイトをご覧ください オーシャンエイジ とバックグラウンドで返信してください。 メリークリスマス この記事のコードを取得する。
関連
-
[解決済み] MATLABで「連結される配列の次元が一致しない」というエラーをデバッグする。
-
[解決済み] Matlabで列ベクトルを反復処理する方法は?[重複].
-
[解決済み] matlabでhashtables/hashmapsを使う方法はありますか?重複
-
[解決済み] MATLABでカラーバーのスケールを制御する
-
[解決済み] Matlabでm-fileを実行するとき、コマンドビューでどのように改行を出力するのですか?
-
[解決済み] MATLABのパスに影をつける」とはどういう意味ですか?ファイル内で行うにはどうしたらいいですか?
-
[解決済み] matlabでchi2gof関数を理解する
-
[解決済み] MATLABでヒストグラムを正規化する方法は?
-
[解決済み] Matlabでベクトルを表示(印刷)するには?
-
[解決済み] MATLABでコンソールをクリアする方法とは?
最新
-
nginxです。[emerg] 0.0.0.0:80 への bind() に失敗しました (98: アドレスは既に使用中です)
-
htmlページでギリシャ文字を使うには
-
ピュアhtml+cssでの要素読み込み効果
-
純粋なhtml + cssで五輪を実現するサンプルコード
-
ナビゲーションバー・ドロップダウンメニューのHTML+CSSサンプルコード
-
タイピング効果を実現するピュアhtml+css
-
htmlの選択ボックスのプレースホルダー作成に関する質問
-
html css3 伸縮しない 画像表示効果
-
トップナビゲーションバーメニュー作成用HTML+CSS
-
html+css 実装 サイバーパンク風ボタン
おすすめ
-
[解決済み】MATLABの&と&&の違いは何ですか?
-
[解決済み] MATLABでctrl+Aを使わずにすべてのコードを自動インデントする
-
[解決済み] Matlabの角括弧と中括弧の違い?
-
[解決済み] MATLABとラスタープロット
-
[解決済み] Wolfram AlphaとMATLABでは伝達関数のプロットが異なる
-
[解決済み] Matlabで固有ベクトルを正しくプロットする
-
[解決済み] キュービックスプライン補間と多項式補間の比較
-
[解決済み] Matlabでのリッジ回帰とOLS回帰
-
[解決済み] Matlabでforward inputnames?
-
Matlab R2018b の Windows へのインストール チュートリアル