DockerのインストールとRocketMQの利用について
2022-02-21 06:04:50
ディレクトリ
I. RocketMQの紹介
Apache RocketMQは、低遅延、高パフォーマンスと信頼性、1兆ドルの容量、および柔軟なスケーラビリティを備えた分散メッセージングおよびストリーミング・プラットフォームです。ネームサーバ、ブローカー、プロデューサー、ユーザの4つの部分から構成されています。
II. RocketMQのDockerインストール
1. RocketMQのイメージの検索
docker search rocketmq
2. ネームサーバーの起動
docker run -d -p 9876:9876 --name rmqserver foxiswho/rocketmq:server-4.7.0
3. ブローカーを起動する
broker.conf ファイルを編集します。
vim /home/rocketmq/broker.conf
を読み取ります。
# Cluster name, you can configure more than one if there are more nodes
brokerClusterName = DefaultCluster
# broker name, master and slave use the same name to indicate their master-slave relationship
brokerName = broker-a
#0 means master, greater than 0 means different slave
brokerId = 0
# indicates when to do the message delete action, default is 4:00 am
deleteWhen = 04
# the length of time the message is kept on disk, in hours
fileReservedTime = 48
# has three values: SYNC_MASTER, ASYNC_MASTER, SLAVE; synchronous and asynchronous indicate the mechanism for synchronizing data between Master and Slave.
brokerRole = ASYNC_MASTER
# flush disk policy, takes the value: ASYNC_FLUSH, SYNC_FLUSH indicates synchronous and asynchronous flush disk; SYNC_FLUSH message is written to disk before returning success status, ASYNC_FLUSH is not required.
flushDiskType = ASYNC_FLUSH
# Set the ip address of the server where the broker node is located
brokerIP1 = 192.168.220.76
コマンドを実行します。
docker run -d -p 10911:10911 -p 10909:10909\
 --name rmqbroker --link rmqserver:namesrv\
 --privileged=true\
 -e "NAMESRV_ADDR=192.168.220.76:9876" -e "JAVA_OPTS=-Duser.home=/opt"\
 -e "JAVA_OPT_EXT=-server -Xms128m -Xmx128m"\
 -v /home/rocketmq/broker.conf:/etc/rocketmq/broker.conf \
 foxiswho/rocketmq:broker-4.7.0
4. rocketmqコンソールを起動します。
docker run -d --name rmqconsole -p 8080:8080 --link rmqserver:namesrv\
 -e "JAVA_OPTS=-Drocketmq.namesrv.addr=192.168.220.76:9876
 -Dcom.rocketmq.sendMessageWithVIPChannel=false"\
 -t styletang/rocketmq-console-ng
5. 可視化ページ、で http://192.168.220.76:8080/

III. RocketMQを使ったJava
1. pom.xmlに依存関係を追加する
<dependency>
    <groupId>org.apache.rocketmq</groupId>
    <artifactId>rocketmq-spring-boot-starter</artifactId>
    <version>2.0.4</version>
</dependency>
2. プロデューサーの作成
// 1 Create the message producer, specifying the generation group name
DefaultMQProducer defaultMQProducer = new DefaultMQProducer("dzp-producer-group");
// 2 Specify the address of the NameServer
defaultMQProducer.setNamesrvAddr("192.168.220.76:9876");
// 3 Start the producer
defaultMQProducer.start();
// 4 Build the message object, mainly setting the message subject, label, content
Message message = new Message("dzp-topic", "dzp-tag", "dzp-key", ("dzp test message sent").getBytes());
// 5 Send the message
SendResult result = defaultMQProducer.send(message);
System.out.println("SendResult-->" + result);
// 6 Close the producer
defaultMQProducer.shutdown();
3. コンシューマの作成
// 1 Create the consumer, specifying the name of the consumer group to which it belongs
DefaultMQPushConsumer defaultMQPushConsumer = new DefaultMQPushConsumer("dzp-consumer-group");
// 2 Specify the address of the NameServer
defaultMQPushConsumer.setNamesrvAddr("192.168.220.76:9876");
// 3 Specify the topics and tags to which the consumer subscribes
defaultMQPushConsumer.subscribe("dzp-topic", "*");
// 4 Perform the subscription: register the callback function and write the logic to handle the message
defaultMQPushConsumer.registerMessageListener((List<MessageExt> list, ConsumeConcurrentlyContext context) -> {
    //and return ConsumeConcurrentlyStatus.RECONSUME_LATER
    try {
      for (MessageExt messageExt : list) {

          String topic = messageExt.getTopic();
          System.out.println("topic-->" + topic);

          String tags = messageExt.getTags();
          System.out.println("tags-->" + tags);

          String keys = messageExt.getKeys();
          System.out.println("keys-->" + keys);

          String body = new String(messageExt.getBody());
          System.out.println("body-->" + body);
        }

    } catch (Throwable throwable) {
        throwable.printStackTrace();
    }

       return ConsumeConcurrentlyStatus.CONSUME_SUCCESS;
    });

    // 5 Start the consumer
    defaultMQPushConsumer.start();
}
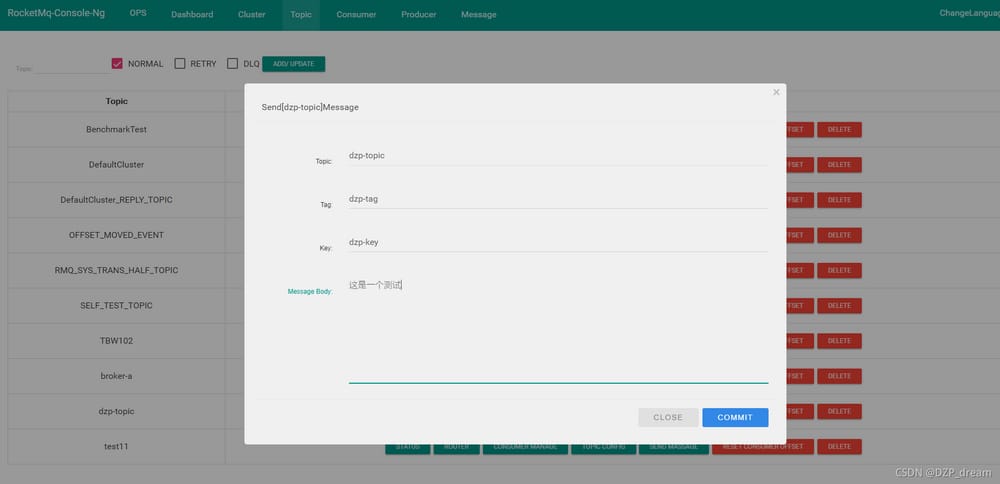
4. メッセージを送信するページを可視化する
![]()
メッセージの書き込み
5. java プログラムで受信したデータ

関連
-
[解決済み】FrontEnd DockerFIle.v0との解決に失敗しました。
-
[解決済み】エラー "入力デバイスはTTYではありません"
-
[解決済み】Docker - 0.0.0.0:4000 のバインドに失敗しました: ポートは既に割り当てられています。
-
[解決済み] 「docker build" は正確に1つの引数を必要とします。
-
[解決済み] アルパインイメージでdockerを使ってbashをユーザrootで実行するには? su: suidでないと正常に動作しません。
-
[解決済み] Ansibleタスクのタイムアウトの最大長
-
[解決済み] Dockerのエラーです。Cannot start service ...: ネットワーク 7808732465bd529e6f20e4071115218b2826f198f8cb10c3899de527c3b637e6 が見つかりませんでした。
-
[解決済み] Dockerfileで-hオプションのように特定のホスト名を扱う方法
-
[解決済み] 複数のディレクトリを1つのコマンドでコピーする
-
docker共通コマンドのまとめ
最新
-
nginxです。[emerg] 0.0.0.0:80 への bind() に失敗しました (98: アドレスは既に使用中です)
-
htmlページでギリシャ文字を使うには
-
ピュアhtml+cssでの要素読み込み効果
-
純粋なhtml + cssで五輪を実現するサンプルコード
-
ナビゲーションバー・ドロップダウンメニューのHTML+CSSサンプルコード
-
タイピング効果を実現するピュアhtml+css
-
htmlの選択ボックスのプレースホルダー作成に関する質問
-
html css3 伸縮しない 画像表示効果
-
トップナビゲーションバーメニュー作成用HTML+CSS
-
html+css 実装 サイバーパンク風ボタン
おすすめ
-
[解決済み] docker-compose down default_network エラー
-
[解決済み] 接続するには、Dockerクライアントを昇格して実行する必要があります。
-
[解決済み] Dockerイメージを1つのコンテナにまとめる方法はありますか?
-
[解決済み] コード 0 で終了 docker
-
[解決済み] docker run --initに相当するdocker-composeは何ですか?
-
[解決済み] Dockerfileの "RUN chmod "が有効でない。
-
[解決済み] Docker - デーモンからのエラー応答:クライアントはサーバーよりも新しいです。
-
docker encountered problem 4: yaml: line 1: mapping values are not allowed in this context.
-
docker上で動作するphpからmysqlへの接続の解決策、表示(HY000/2002)。接続が拒否されました
-
bashでの解決方法 : docker :コマンドが見つかりません。