Centron Openstackクラウドプラットフォーム構築【超詳細】【画像付き
前置き
<ブロッククオート私は2年生の後期にOpenstackを学びましたが、BaiduやCSDNに対応版のチュートリアルがなく苦労したので、ここに私のOpenstackクラウド基盤構築プロセスを書き出し、初心者の方にお任せすることにします
準備
VMware Workstation Pro 仮想マシン 使用しているバージョン:15.5.2 build-15785246
CentOS-7-x86_64-DVD-1511.iso
XianDian-IaaS-v2.2.iso
必要な2つのミラーを記入する
リンク: https://pan.baidu.com/s/1RUzNN4j8myJhMlFerny7uw
抽出コード: bxae
このコンテンツをコピーして、Baidu.comモバイルアプリを開くと、操作がより便利になります!
仮想マシンの構成(コントローラとコンピュート構成は同じです)。
<ブロッククオートメモリ3G
プロセッサー 2G
ハードディスク 50G
CD/DVD CentOS-7-x86_64-DVD-1511.iso
ネットワークアダプタ VMnet1
ネットワークアダプタ2 VMnet2
コントローラおよびコンピュートネットワークの構成
<テーブル ホスト名 VMnet1 VMnet2 コントローラ 192.168.28.10 192.168.128.10 計算 192.168.28.20 192.168.128.20コントローラ ホスト名を変更し、ファイアウォールをオフにし、仮想マシンを有効にするためにホストマッピングを設定します
hostnamectl set-hostname controller
systemctl stop firewalld
systemctl disable firewalld
setenforce 0
sed -i 's/SELINUX=enforcing/SELINUX=disabled/g' /etc/selinux/config
cat >>/etc/hosts<<eof
192.168.28.10 controller
192.168.28.20 compute
eof
計算する
hostnamectl set-hostname compute
systemctl stop firewalld
systemctl disable firewalld
setenforce 0
sed -i 's/SELINUX=enforcing/SELINUX=disabled/g' /etc/selinux/config
cat >>/etc/hosts<<eof
192.168.28.10 controller
192.168.28.20 compute
eof
コントローラ
次に、opt ディレクトリに移動し、centos と iaas のマウントポイントを作成し、CRT を使用して xiandian イメージを opt ディレクトリに渡します。
cd /opt
mkdir centos iaas
起動時に自動的にマウントするイメージファイルを設定する
cat >>/etc/fstab<<eof
/dev/cdrom /opt/centos iso9660 defaults 0 0
/opt/XianDian-IaaS-v2.2.iso /opt/iaas iso9660 defaults 0 0
eof
即座に実装される
mount -a
etc/yum.repos.d ディレクトリに移動し、大文字の C で始まるファイルを削除または移動します。そうしないと、後でキャッシュ・エラーが発生します。
cd /etc/yum.repos.d
mkdir bk
mv C* bk
cat >>/etc/yum.repos.d/local.repo<<eof
[centos]
name=centos
baseurl=file:///opt/centos
gpgcheck=0
enabled=1

[iaas]
name=iaas
baseurl=file:///opt/iaas/iaas-repo
gpgcheck=0
enabled=1
eof
キャッシュのクリア、キャッシュの生成
yum clean all
yum makecache
成功を示すプロンプトが表示されます(isoのバージョンによってキャッシュが異なるため、私のものと完全に同じである必要はありません)。
[root@controller ~]# yum makecache
Loaded plugin: fastestmirror
centos | 3.6 kB 00:00:00
iaas | 2.9 kB 00:00:00
(1/7): centos/filelists_db | 2.9 MB 00:00:00
(2/7): centos/group_gz | 155 kB 00:00:00
(3/7): iaas/filelists_db | 1.9 MB 00:00:00
(4/7): iaas/primary_db | 2.3 MB 00:00:00
(5/7): centos/primary_db | 2.8 MB 00:00:00
(6/7): iaas/other_db | 692 kB 00:00:00
(7/7): centos/other_db | 1.2 MB 00:00:00
Determining fastest mirrors
Metadata cache has been created
備考 下の段落のメッセージが表示された場合、前のステップでyumのソースが正しく設定されていないか、正しくマウントされていないために、ここで大きな間違いを犯していることになります
[root@compute yum.repos.d]# yum makecache
Loaded plugin: fastestmirror


 One of the configured repositories failed (unknown),
 and yum doesn't have enough cached data to continue. At this point the only
 There are a few ways to work "fix" this. 1:

     Contact the upstream for the repository and get them to fix the problem.

     Reconfigure the baseurl/etc. for the repository, to point to a working
        This is most often useful if you are using a newer
        distribution release than is supported by the repository (and the
        packages for the previous distribution release still work).

     Disable the repository, so yum won't use it by default.
        just ignore the repository until you permanently enable it again or use
/var/run/yum.pid が表示された場合
次のコマンドを実行するだけです。
rm -rf /var/run/yum.pid
次に vsftpd と iaas-xiandian をインストールします。
yum install iaas-xiandian vsftpd -y
コントローラにftp(ファイル転送)サービスをインストールします。
匿名アクセスの追加
cat >>/etc/vsftpd/vsftpd.conf<<eof
anon_root=/opt
eof
systemctl restart network
systemctl start vsftpd
systemctl enable vsftpd
次に、xiandianのopenrc.sh応答ファイルを設定します(単語は間違ってません)。
sed -i 's/. //' /etc/xiandian/openrc.sh
sed -i 's/PASS=/PASS=000000/g' /etc/xiandian/openrc.sh
sed -i 's/HOST_IP=/HOST_IP=192.168.28.10/g' /etc/xiandian/openrc.sh
sed -i 's/HOST_NAME=/HOST_NAME=controller/g' /etc/xiandian/openrc.sh
sed -i 's/HOST_IP_NODE=/HOST_IP_NODE=192.168.28.20/g' /etc/xiandian/openrc.sh
sed -i 's/HOST_NAME_NODE=/HOST_NAME_NODE=compute/g' /etc/xiandian/openrc.sh
sed -i 's/RABBIT_USER=/RABBIT_USER=openstack/g' /etc/xiandian/openrc.sh
sed -i 's/DOMAIN_NAME=/DOMAIN_NAME=demo/g' /etc/xiandian/openrc.sh
sed -i 's/METADATA_SECRET=/METADATA_SECRET=000000/g' /etc/xiandian/openrc.sh
sed -i 's/INTERFACE_NAME=/INTERFACE_NAME=ens34/g' /etc/xiandian/openrc.sh
次に、コマンド cat /etc/xiandian/openrc.sh で設定ファイルを表示し、設定後、次のようになります。
#--------------------system Config--------------------##
#Controller Server Manager IP. example:x.x.x.x
HOST_IP=192.168.28.10

#Controller Server hostname. example:controller
HOST_NAME=controller

#Compute Node Manager IP. example:x.x.x.x
HOST_IP_NODE=192.168.28.20

#Compute Node hostname. example:compute
HOST_NAME_NODE=compute

#--------------------Rabbit Config ------------------##
#user for rabbit. example:openstack
RABBIT_USER=openstack

#Password for rabbit user .example:000000
RABBIT_PASS=000000

#--------------------MySQL Config---------------------##
#Password for MySQL root user . exmaple:000000
DB_PASS=000000

#--------------------Keystone Config------------------##
#Password for Keystore admin user. exmaple:000000
DOMAIN_NAME=demo
ADMIN_PASS=000000
DEMO_PASS=000000

#Password for Mysql keystore user. exmaple:000000
KEYSTONE_DBPASS=000000

#--------------------Glance Config--------------------##
#Password for Mysql glance user. exmaple:000000
GLANCE_DBPASS=000000

#Password for Keystore glance user. exmaple:000000
GLANCE_PASS=000000

#--------------------Nova Config----------------------##
#Password for Mysql nova user. exmaple:000000
NOVA_DBPASS=000000

#Password for Keystore nova user. exmaple:000000
NOVA_PASS=000000

#--------------------Neturon Config-------------------##
#Password for Mysql neutron user. exmaple:000000
NEUTRON_DBPASS=000000

#Password for Keystore neutron user. exmaple:000000
NEUTRON_PASS=000000

#metadata secret for neutron. exmaple:000000
METADATA_SECRET=000000

#External Network Interface. example:eth1
INTERFACE_NAME=ens37

#First Vlan ID in VLAN RANGE for VLAN Network. exmaple:101
minvlan=

#Last Vlan ID in VLAN RANGE for VLAN Network. example:200
maxvlan=

#--------------------Cinder Config--------------------##
#Password for Mysql cinder user. exmaple:000000
CINDER_DBPASS=

#Password for Keystore cinder user. exmaple:000000
CINDER_PASS=

#Cinder Block Disk. example:md126p3
BLOCK_DISK=

#--------------------Trove Config--------------------##
#Password for Mysql Trove User. exmaple:000000
TROVE_DBPASS=

#Password for Keystore Trove User. exmaple:000000
TROVE_PASS=

#--------------------Swift Config---------------------##
#Password for Keystore swift user. exmaple:000000
SWIFT_PASS=

#The NODE Object Disk for Swift. example:md126p4.
OBJECT_DISK=

#The NODE IP for Swift Storage Network. example:x.x.x.x.
STORAGE_LOCAL_NET_IP=

#--------------------Heat Config----------------------##
#Password for Mysql heat user. exmaple:000000
HEAT_DBPASS=

#Password for Keystore heat user. exmaple:000000
HEAT_PASS=

#--------------------Ceilometer Config----------------##
#Password for Mysql ceilometer user. exmaple:000000
CEILOMETER_DBPASS=

#Password for Keystore ceilometer user. exmaple:000000
CEILOMETER_PASS=

#--------------------AODH Config----------------##
#Password for Mysql AODH user. exmaple:000000
AODH_DBPASS=

#Password for Keystore AODH user. exmaple:000000
AODH_PASS=
この時点で、コントローラは設定を停止し、コンピュート設定が開始されます。
コンピュート
コントローラのopt/下のマウントファイルが接続されているかどうかを確認する
[root@compute yum.repos.d]# curl ftp://192.168.28.10
-rw-r--r-- 1 0 0 2851502080 Jun 04 2020 XianDian-IaaS-v2.2.iso
dr-xr-xr-x 8 0 0 0 2048 Dec 09 2015 centos
drwxr-xr-x 4 0 0 2048 Nov 06 2017 iaas
optディレクトリに移動し、centosとiaasのファイルを作成し、大文字のCで始まるファイルを移動または削除し、ftp.repoのソースファイルを作成します。
cd /opt
mkdir centos iaas
cd /etc/yum.repos.d/
mkdir bk
mv C* bk
touch ftp.repo
etc/yum.repos.d/ftp.repo に移動し、次のように記述します。
cat >>/etc/yum.repos.d/ftp.repo<<eof
[centos]
name=centos
baseurl=ftp://192.168.28.10/centos
gpgcheck=0
enabled=1

[iaas]
name=iaas
baseurl=ftp://192.168.28.10/iaas/iaas-repo
gpgcheck=0
enabled=1
eof
キャッシュのクリア、キャッシュの生成
yum clean all
yum makecache
以下の画面が表示されれば成功です。
[root@compute yum.repos.d]# yum makecache
Loaded plugin: fastestmirror
centos | 3.6 kB 00:00:00
iaas | 2.9 kB 00:00:00
(1/7): centos/group_gz | 155 kB 00:00:00
(2/7): centos/filelists_db | 2.9 MB 00:00:00
(3/7): centos/primary_db | 2.8 MB 00:00:00
(4/7): centos/other_db | 1.2 MB 00:00:00
(5/7): iaas/filelists_db | 1.9 MB 00:00:00
(6/7): iaas/primary_db | 2.3 MB 00:00:00
(7/7): iaas/other_db | 692 kB 00:00:00
Determining fastest mirrors
Metadata cache created
iaas-xiandain を /etc/xiandian にダウンロードし、openrc.sh を openrc.sh.bk にリネームして、エラーに備えてバックアップをとっておく。
次に、/etc/xiandian/openrc.sh ファイルをコントローラ (192.168.28.10) からローカルマシンに転送します。
yum -y install iaas-xiandian
cd /etc/xiandian
mv openrc.sh openrc.sh.bk
scp 192.168.28.10:/etc/xiandian/openrc.sh openrc.sh
インストールスクリプトの実行
両ノードの初期化スクリプトを実行します。
iaas-pre-host.sh
注意:実行に時間がかかるので、Enterキーを押したりしないでください。[reboot]プロンプトの後、再起動しないと、その後のインスタンスが送出されないので、大問題です ともに再起動
reboot
仮想マシンのリブート
コントロールノードのインストール(コントローラ)
cd /usr/local/bin
cat >>/usr/local/bin/all-in-one.sh<<eof
iaas-install-mysql.sh
iaas-install-keystone.sh
iaas-install-glance.sh
iaas-install-nova-controller.sh
iaas-install-neutron-controller.sh
iaas-install-neutron-controller-gre.sh
iaas-install-dashboard.sh
eof
source all-in-one.sh
コンピュートノードのインストール(compute)
cd /usr/local/bin
cat >>/usr/local/bin/all-in-one.sh<<eof
iaas-install-nova-compute.sh
iaas-install-neutron-compute.sh
iaas-install-neutron-compute-gre.sh
eof
source all-in-one.sh
インストールに時間がかかりますので、しばらくお待ちください
実行完了後
Chromeでアクセスした場合(他のブラウザでは調子が悪く、アクセスできないことがあります)
<ブロッククオートhttp://控制IP/dashboard
私のコントロールノードのIPは192.168.28.10です。
というわけで、次のようにアクセスします。
<ブロッククオートhttp://192.168.28.10/dashboard
アクセス成功画面
ドメイン:demo
ユーザー名:admin
パスワード:000000

入る
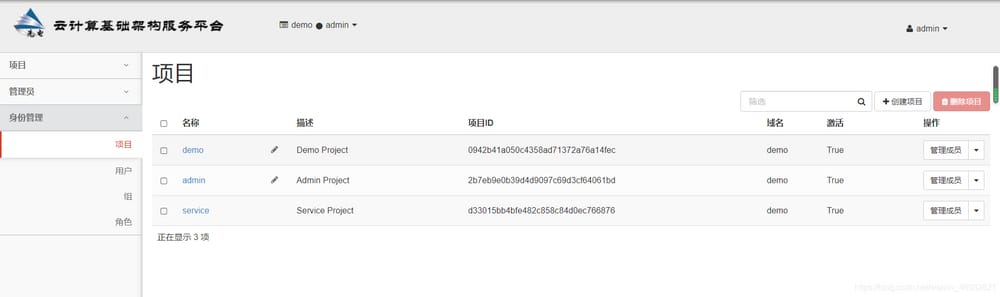
これで、Openstack Cloud Platform のインストールは終了です。
関連
-
ssh@host:""ssh スイッチで他のマシンで複数のコマンドを実行する。stdin はターミナルではないので、擬似ターミナルは割り当てられない。
-
エラー解決:bash: nvm: コマンドが見つかりません。
-
ARM Linuxの割り込みメカニズム解析
-
パイプが壊れた java.io.IOException: パイプの破損 解決方法
-
metasploitに関するいくつかのアーキテクチャカタログ
-
CentOS 7のインストールとDockerの展開
-
scpコマンドが通常のファイルでないことを報告する問題の解決法
-
テキストファイルのビジー状態解消
-
要求された URL * はこのサーバーで見つかりませんでした。
-
elasticsearchを解決する。例外 BindTransportException [9300-9400]へのバインドに失敗しました]。
最新
-
nginxです。[emerg] 0.0.0.0:80 への bind() に失敗しました (98: アドレスは既に使用中です)
-
htmlページでギリシャ文字を使うには
-
ピュアhtml+cssでの要素読み込み効果
-
純粋なhtml + cssで五輪を実現するサンプルコード
-
ナビゲーションバー・ドロップダウンメニューのHTML+CSSサンプルコード
-
タイピング効果を実現するピュアhtml+css
-
htmlの選択ボックスのプレースホルダー作成に関する質問
-
html css3 伸縮しない 画像表示効果
-
トップナビゲーションバーメニュー作成用HTML+CSS
-
html+css 実装 サイバーパンク風ボタン
おすすめ
-
undefinedmakefile:4: *** セパレータがありません。
-
Ubuntu で vs code のソースファイル "iostream" を開けない。
-
LNMP nginx1.4.6+php5.5.11+mysql5.6.17+mecache+opcache コンパイルとインストール+opcacheパラメータ詳細+opcacheビジュアルPHPページコード
-
ubuntu installationEnvironmentError: mysql_config not found エラー
-
エラー: 'for' ループの初期宣言は C99 モードでのみ許可されます。
-
解決済み gpg: 有効な OpenPGP データが見つかりません。
-
kill はプロセスを終了させることができません
-
AttributeError: Linux上のFLASKプロジェクトでデータベースに接続すると、属性を設定できない
-
ソケットプログラミング、エラーの原因 ソケット以外でのソケット操作
-
linux ubuntu 'string' はこのスコープで宣言されていない Parse